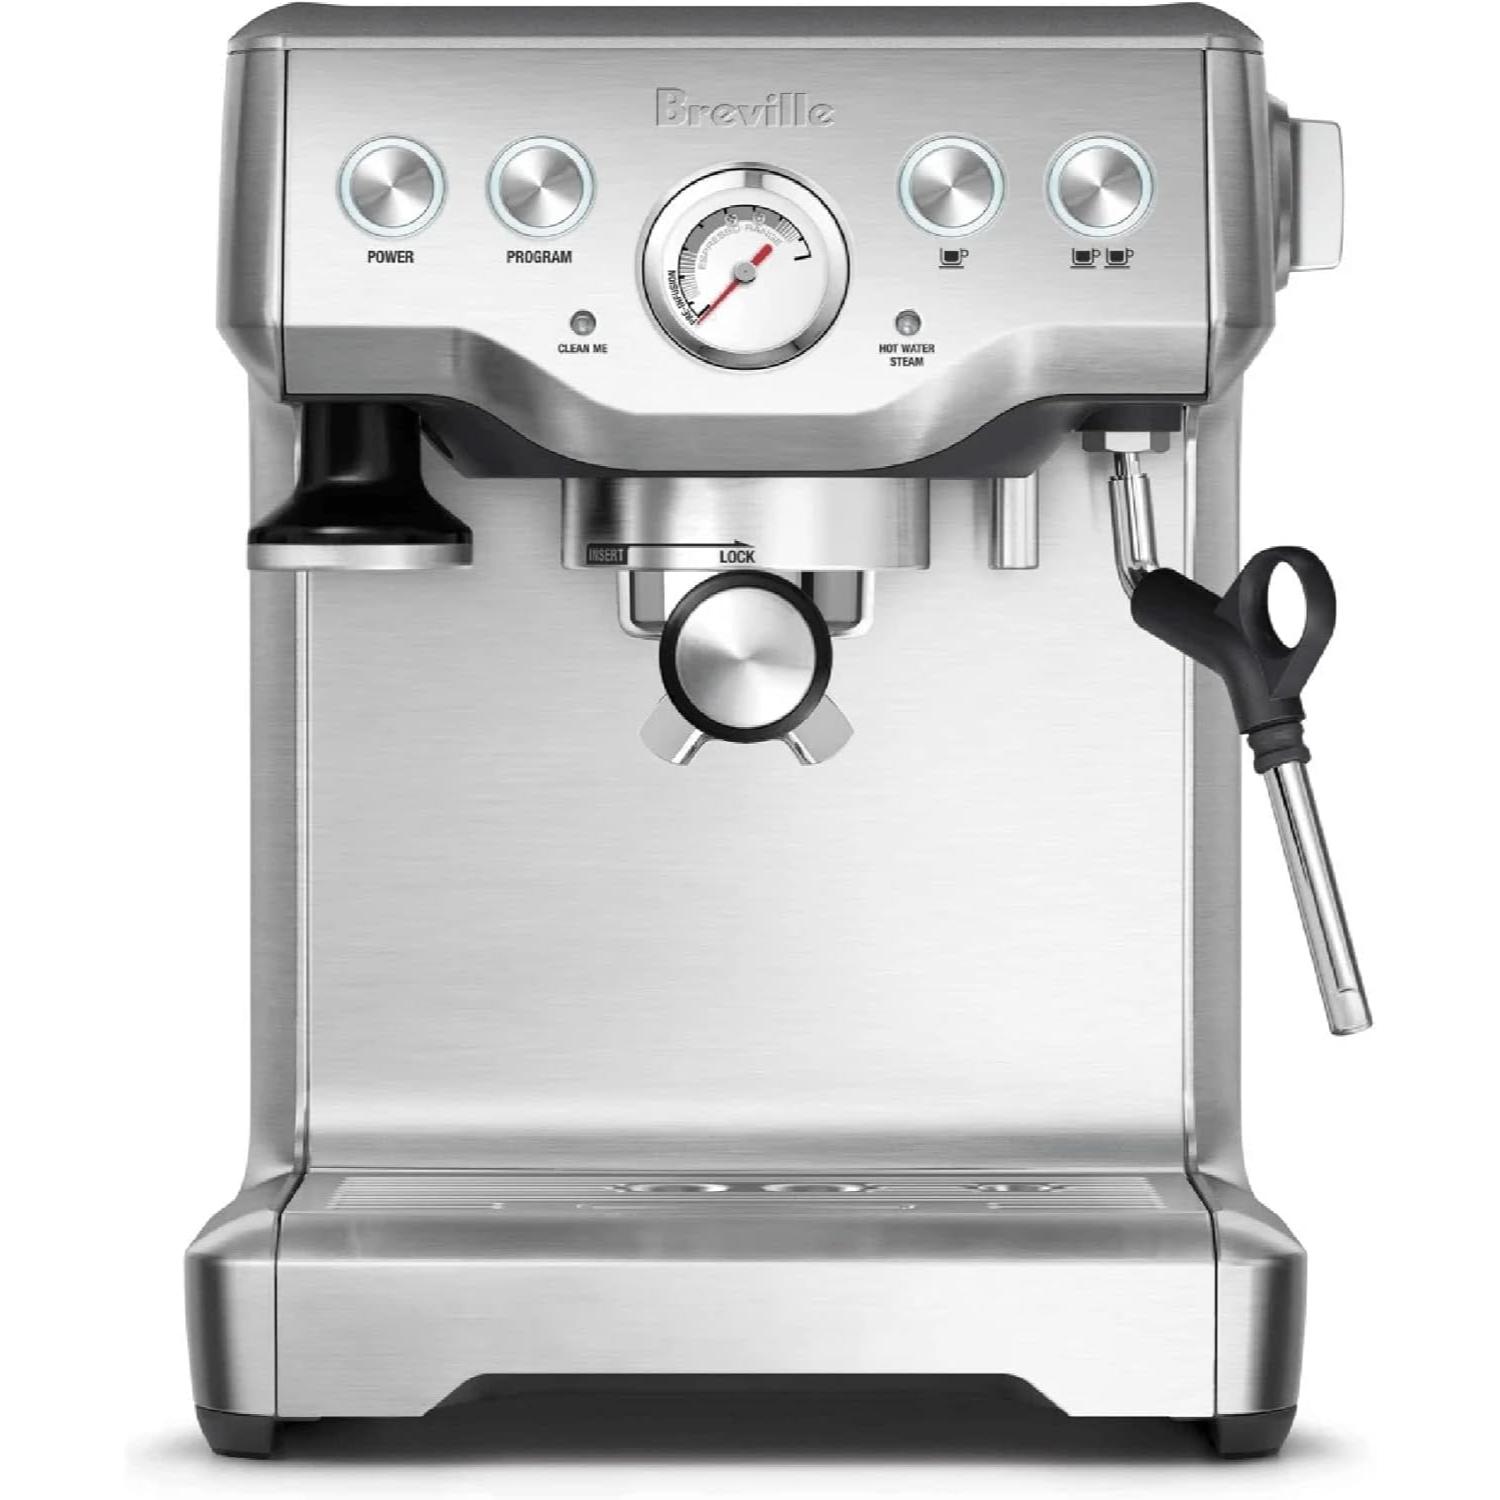

Breville Infuser Espresso Machine BES840XL
The Breville Infuser BES840XL is more than just a pretty machine — it’s a smart investment for coffee lovers who crave customization, control, and quality. With features like low-pressure pre-infusion, digital temperature control, and manual microfoam texturing, it ensures that every espresso shot is perfectly balanced and full-bodied. Built with Breville’s hallmark precision engineering and backed by user-friendly programming, this machine bridges the gap between beginner-friendly simplicity and pro-grade performance.
Its compact design, programmable shot volumes, and steam wand for latte art make it a standout in its price range. Whether you’re crafting single shots, double shots, or creamy cappuccinos, the Infuser puts quality and consistency in your hands every morning.
Product Highlights & Features
✅ Pre-Infusion Technology
Applies low pressure at the start of extraction to ensure even saturation and rich flavor in every shot.
✅ PID Temperature Control
Maintains stable water temperature throughout brewing, with adjustable increments of 2°F for precision.
✅ Volumetric Control
Programmable shot control lets you select 1 shot, 2 shots, or manually override for custom volumes.
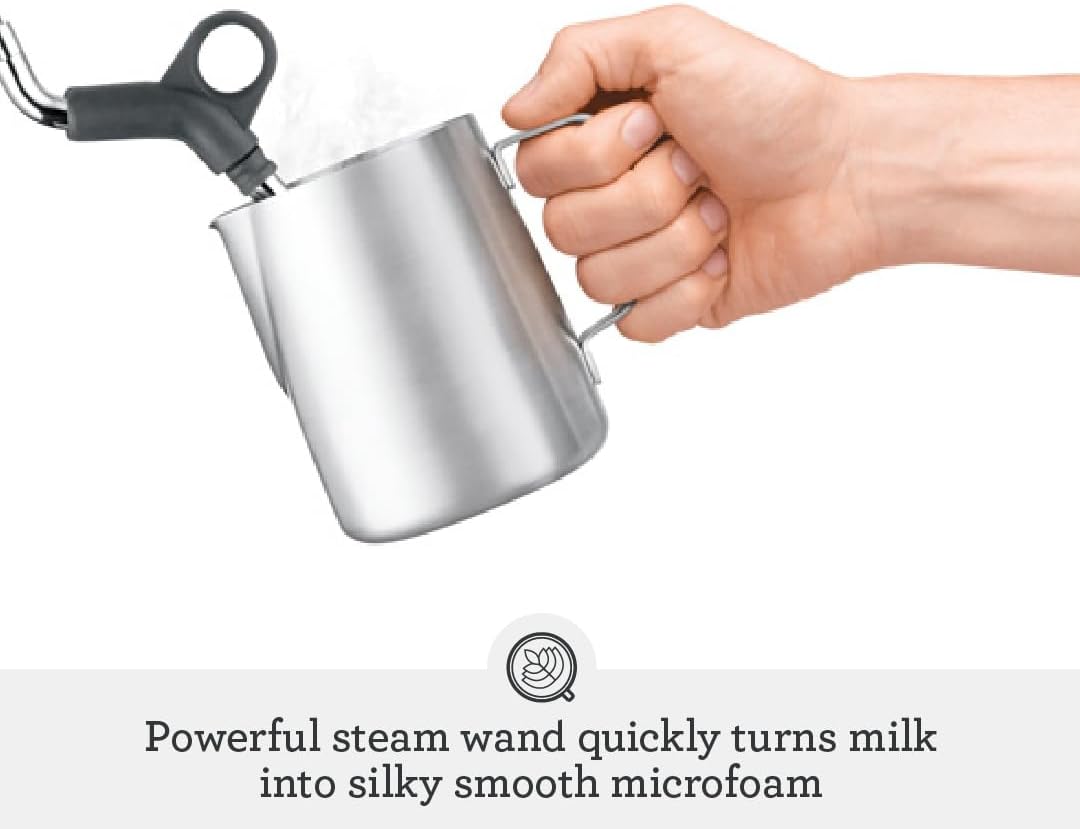
✅ 1650W High-Power Steam Wand
Produces silky microfoam essential for third-wave latte art and creamy cappuccinos.
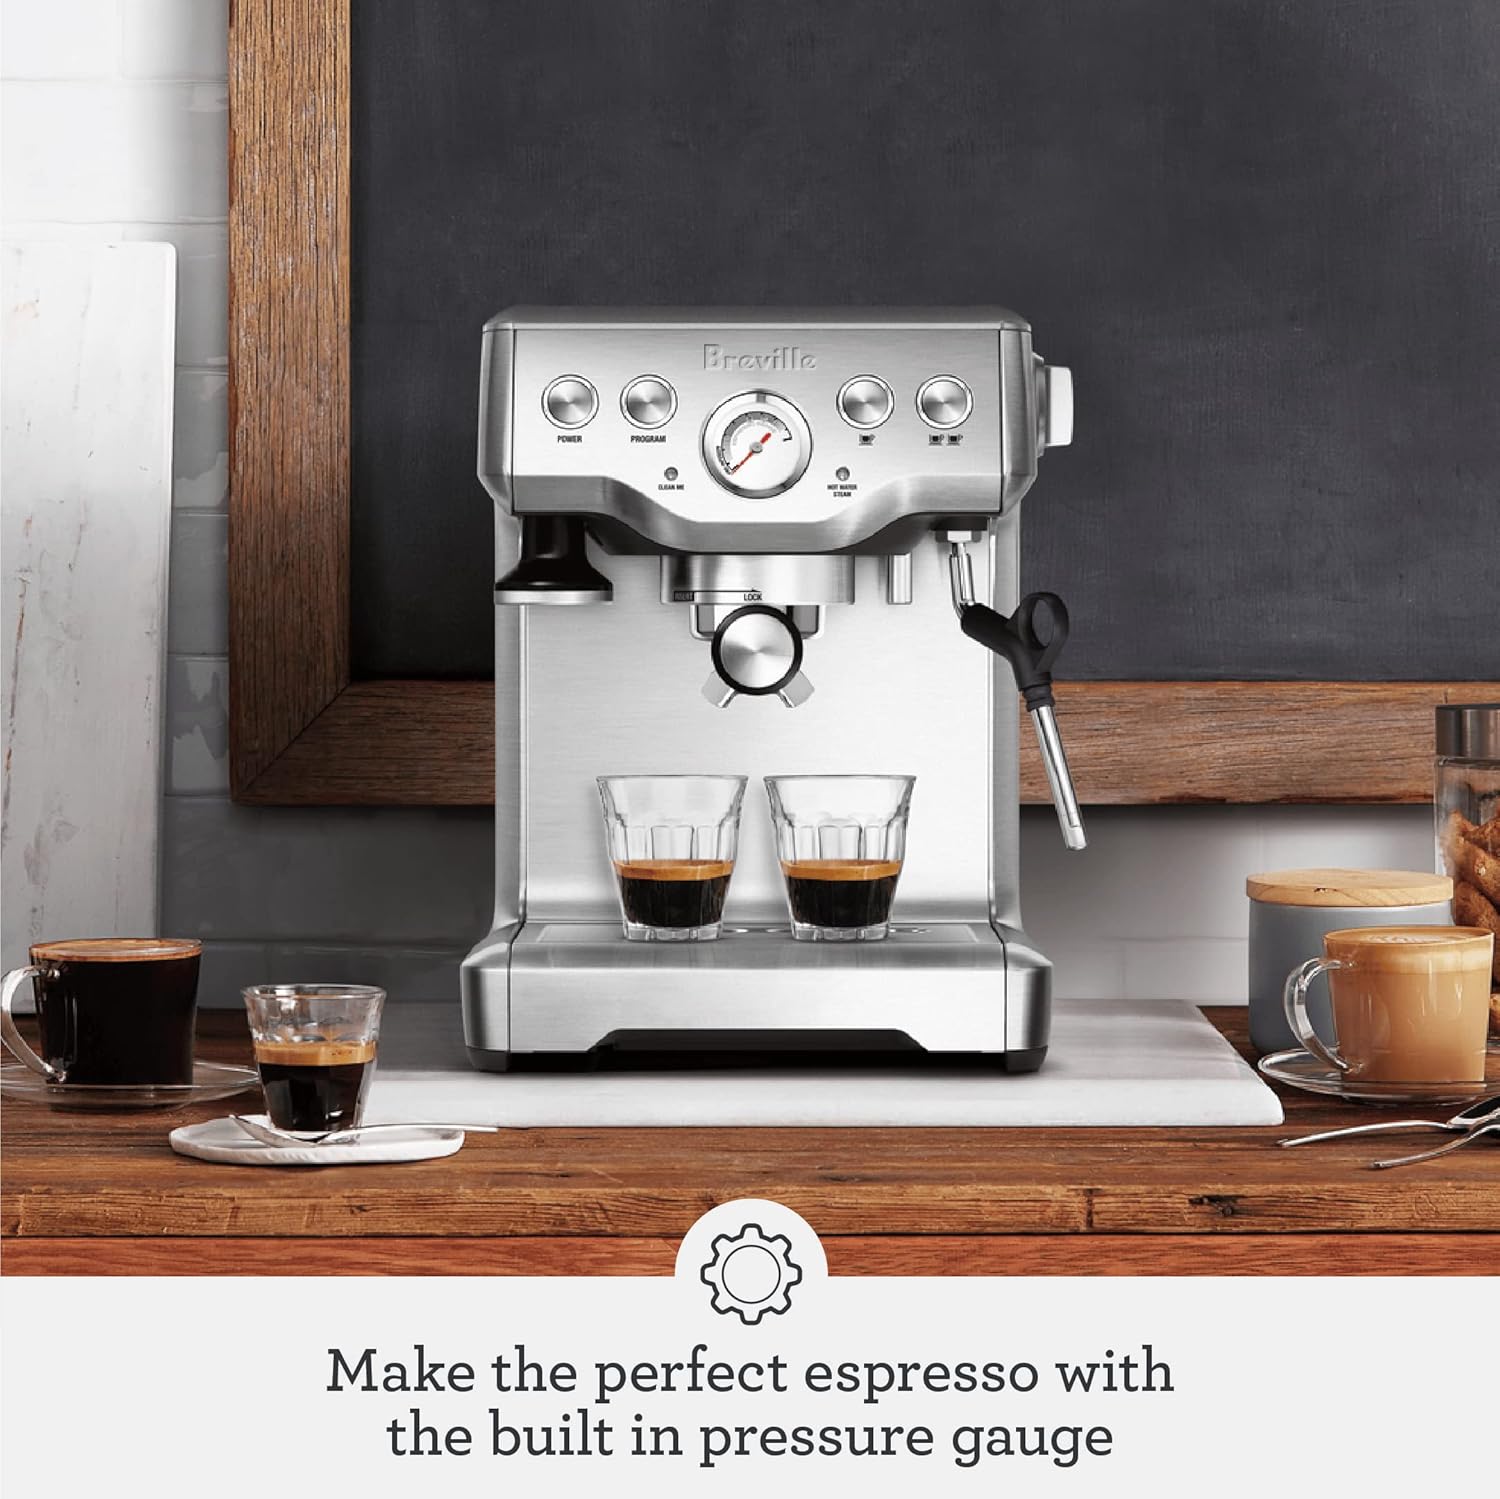
✅ Pressure Gauge Monitoring
Real-time feedback for optimal extraction — adjust grind size or tamp accordingly.
✅ Auto-Purge Function
Automatically cools the heating system after steaming to ensure the next shot is brewed at the right temperature.
✅ Compact Footprint
Sleek stainless steel design fits beautifully on any kitchen counter without taking up excess space.
✅ Large Water Tank (1.7L)
Brew multiple drinks without frequent refills — ideal for households or small offices.
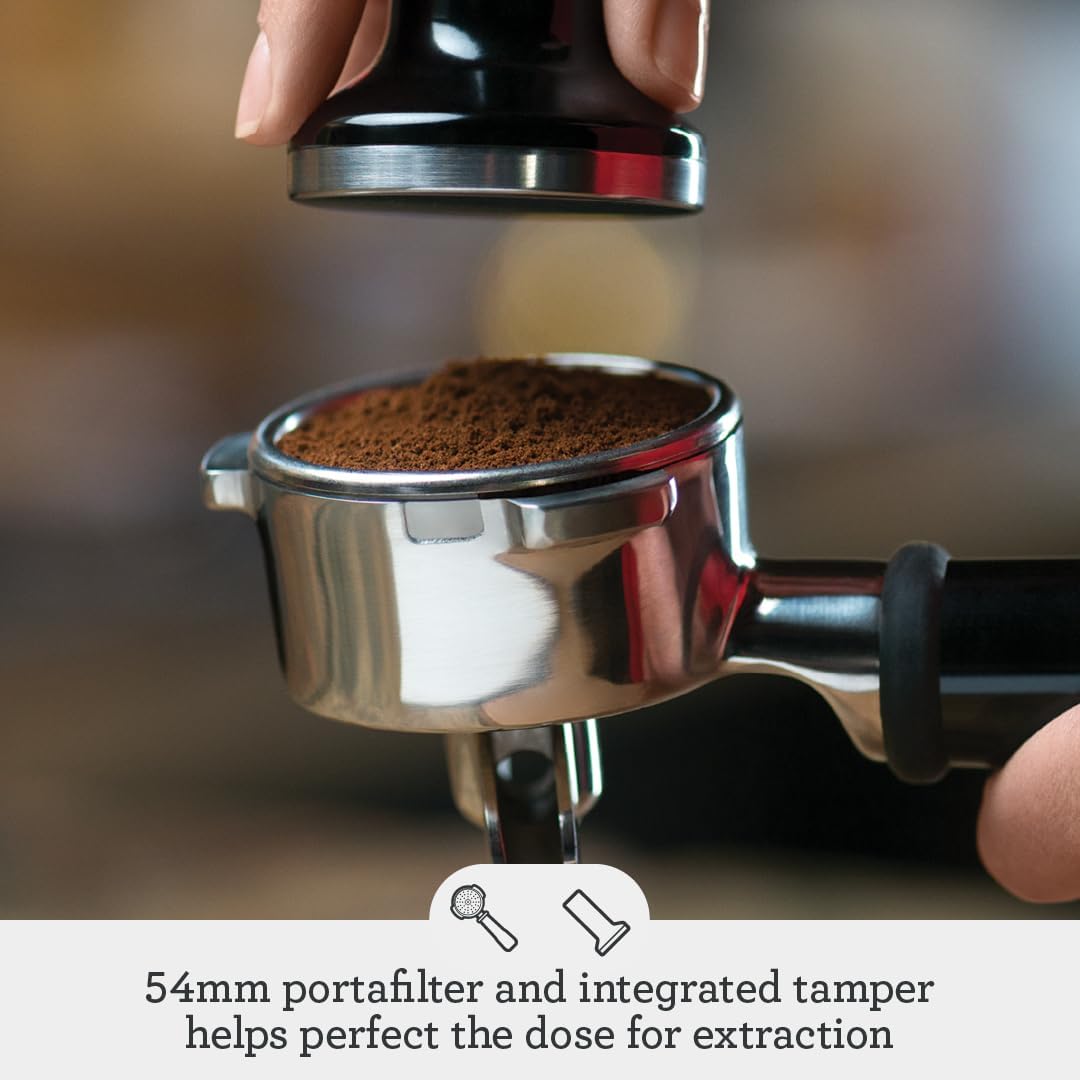
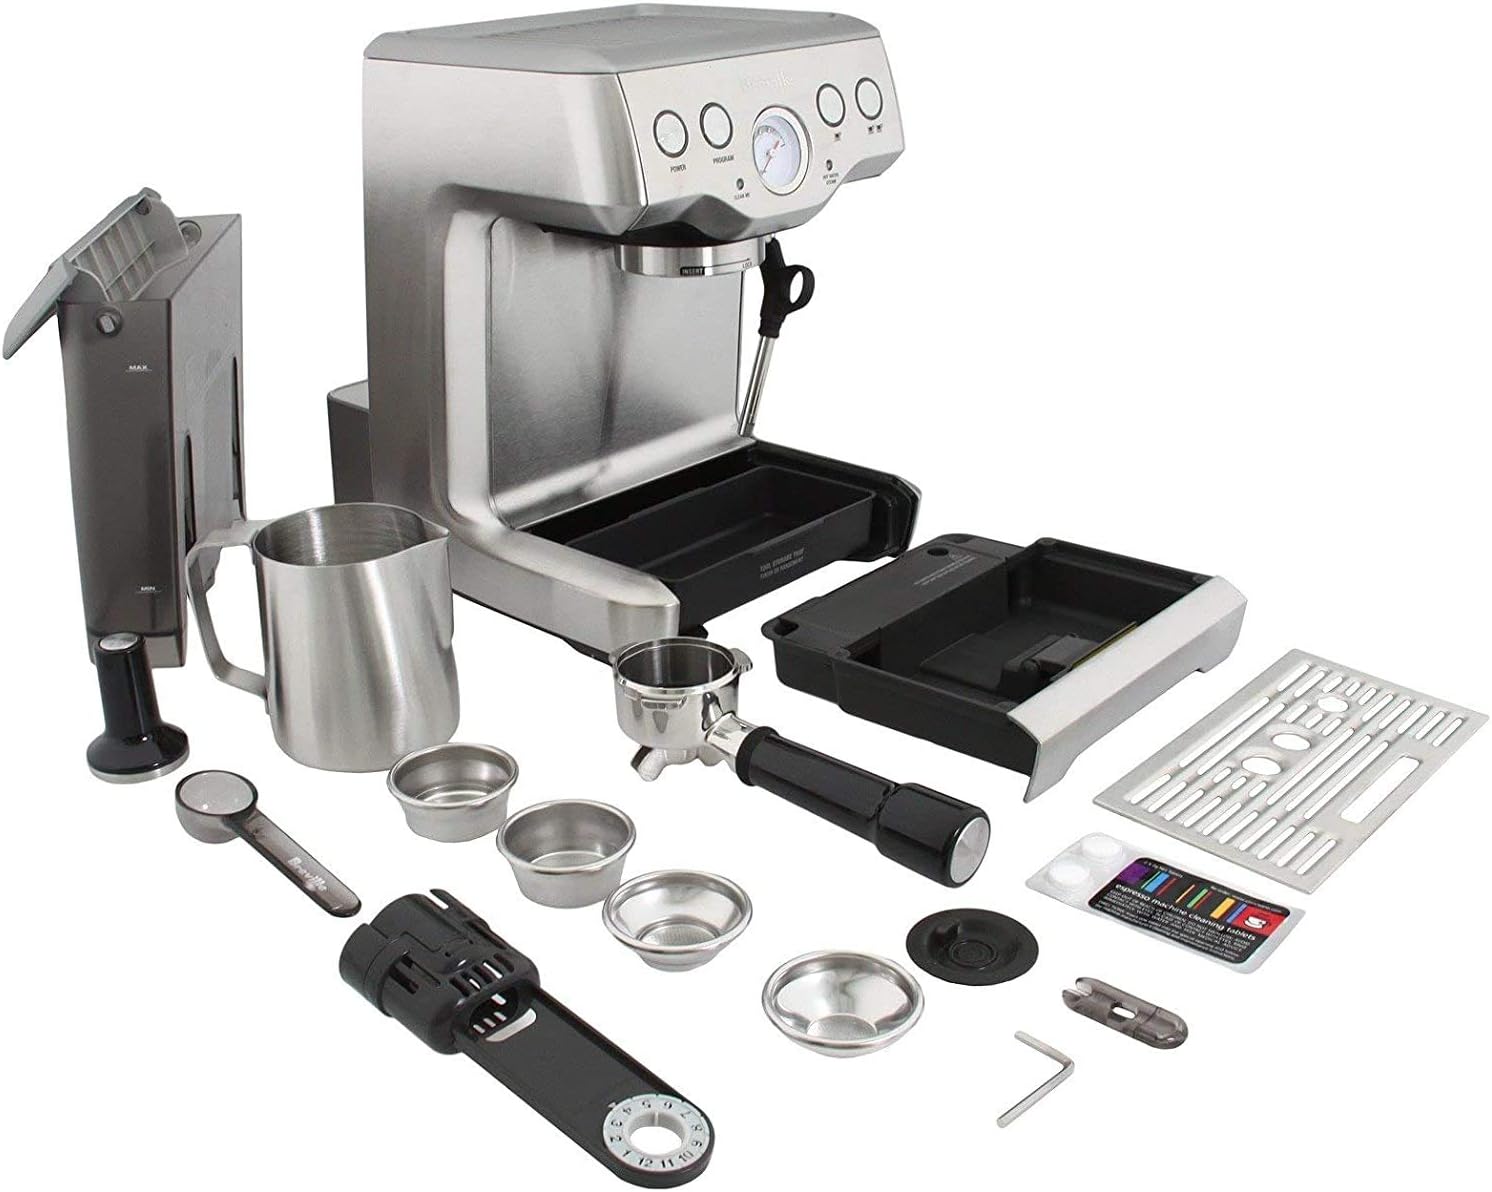
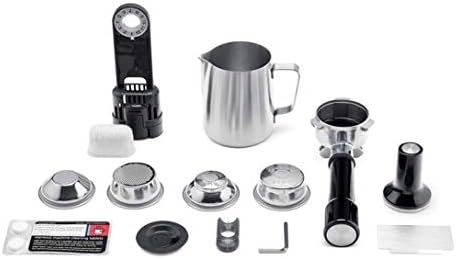
✅ Accessories Included
Comes with filter baskets, cleaning tools, water filter holder, stainless steel milk jug, and tamper.
Technical Specifications
| Feature | Description |
|---|---|
| Brand | Breville |
| Model | BES840XL (The Infuser) |
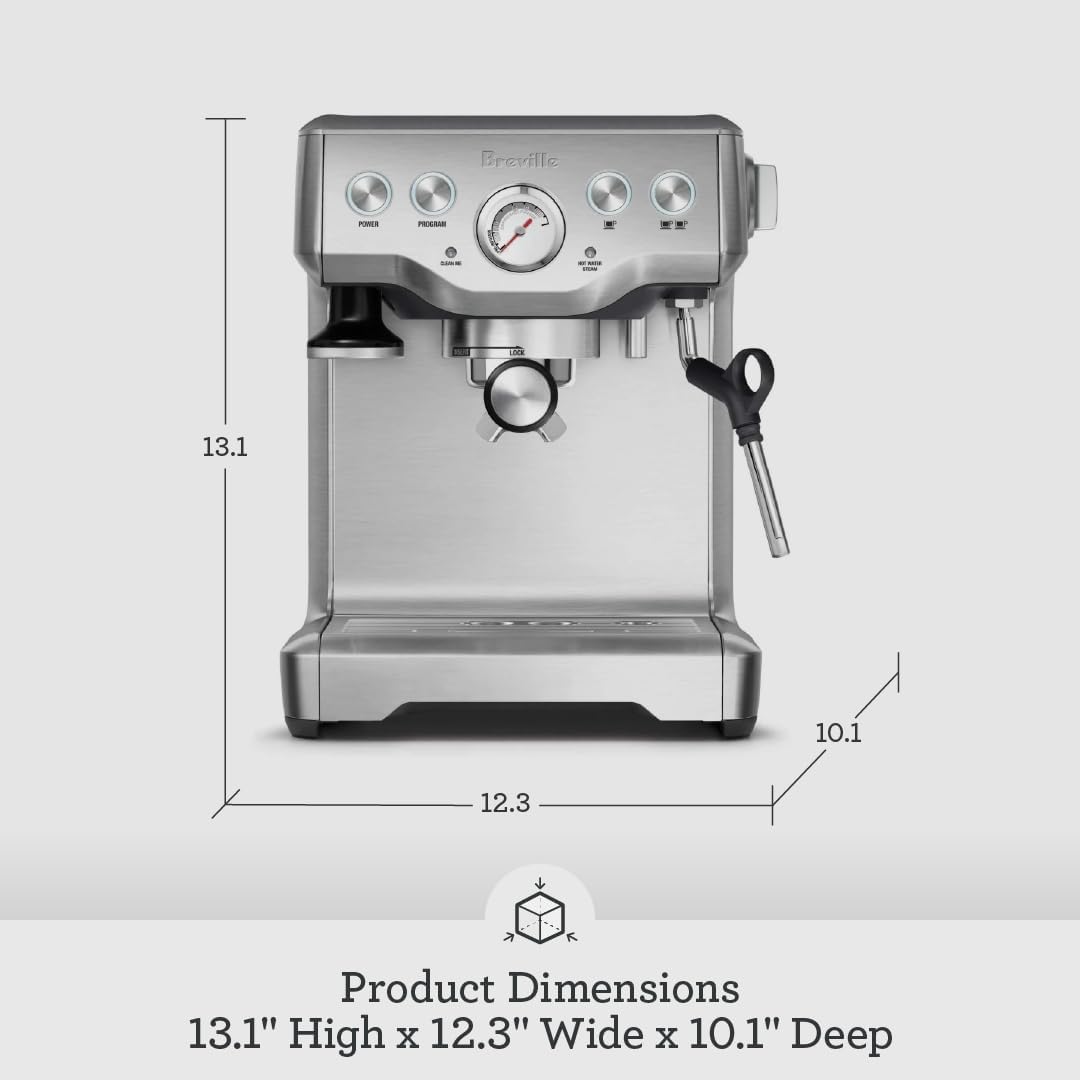
| Dimensions (DxWxH) | 10.12″ x 12.28″ x 13.15″ |
| Weight | 17.42 lbs |
| Water Tank Capacity | 1.7 Liters |
| Material | Brushed Stainless Steel |
| Wattage | 1650 Watts |
| Voltage | 110–120 Volts |
| Special Features | Pre-Infusion, PID Control, Auto-Purge |
| Milk Frother | Manual steam wand |
| User Interface | Push-button with pressure gauge |
| Included Accessories | Portafilter, milk jug, tamper, filters, tools |
| Heating System | Thermocoil |
| Interface | Button-based |
| Warranty | Manufacturer warranty available |
Final Verdict
If you’re looking for a professional-grade espresso experience at home, the Breville BES840XL Infuser Espresso Machine is a top-tier choice in the semi-automatic category. It expertly balances ease of use with advanced features, giving you the tools to craft lattes, cappuccinos, and espressos that rival your favorite café.
Whether you’re a beginner or budding home barista, the Infuser offers the flexibility to grow with your skills while always delivering exceptional coffee. With its elegant stainless-steel body, intuitive controls, and robust build, it’s a machine that looks as good as it performs.
Recommended for:
☕ Coffee lovers who want full control over espresso-making
🎨 Aspiring latte artists
🏠 Households seeking a dependable, high-performance machine
💰 Value-conscious buyers who want top-tier quality under $500
Make the switch to third-wave coffee at home — the Breville Infuser is your ticket to the ultimate coffee ritual.


LyndonL –
I love it… but it’s all about the beans and the grinds
If 4 stars = “I like it” and 5 stars = “I love it” then I have to go with 5 stars because once you get the hang of the Breville BES840XL, it’s a great machine. As a number of the other reviews have said, though, there is some trial and error involved before you finally get it working the way you want and getting there is frustrating.After the La Pavoni unit we’d had for 10 years died a couple of months back, I did a fair amount of research on rival models as well as the 860XL as a replacement but kept coming back to the two Breville models. The built-in grinder would have been really handy but concerns over leaks over time reported by owners in the seal between the dual boilers (not to mention the price difference) prompted me to go with the 840XL “Infuser”.First off, it’s a beautiful-looking machine and it looks great on the kitchen counter. Also, Breville’s packaging is Apple levels of gorgeous. There’s a handy storage tray behind the spill trap for all the bits and pieces, including pins to unclog the foaming spout, etc. .It’s also really easy to operate and I love that you can re-program the one- and two-shot volume to draw your own size of shot. When it gets dirty, the “Clean Me” light comes on and you initiate the self-clean program with the supplied detergent tablets.And, most importantly of all, it makes great espresso. Night and day better than the La Pavoni Lusso we had before which was really inconsistent in the quality of shot and has no programmable shot option so everything is manual. Also, the La Pavoni’s steaming spout was designed in such a way that build-up inside the spout (which was almost impossible to clean properly) would really diminish its ability to froth the milk properly. The Infuser has a completely different design and it’s awesome, giving you complete control.It took time to master The Infuser, though, and it was frustrating trying to get any consistency out of it. And that was knowing going in, based on other reviewers’ experiences, that a lot of it was in the tamping and volume of ground coffee going into the basket.I would say now, based on my experiences, the beans and the quality of the grinder (see below) might be the biggest determining factors — I would never have guessed just how *much* difference there can be between different types of beans when it comes to tamping pressure and volume. I did a lot of experimenting early on — even resorting to extracting two singles instead of one double because that was the only way I could get a decent extraction in the middle of the unit’s “Espresso Range” putting the grounds in in three stages and tamping down each time in between — but once I’d upgraded to a better grinder, I was set.Now that it looks like I’ve nailed the process, I couldn’t be happier. And my wife, who has incredibly discerning taste buds, especially for coffee, has really noticed the difference.*****************UPDATE May 2014My old Krups burr grinder died last December so I decided to make the investment in a Breville BCG800XL Smart Grinder and I have to say that The Infuser is a LOT more consistent now than it used to be. Not entirely — I find that the strength of the extraction changes over time between cleaning cycles so that more tamping pressure is needed — but I no longer need to mess around with two single pulls or staged tamping.I just grind the beans, tamp them down and let The Infuser do its thing. One small issue that has cropped up in the last few weeks is that water leaks down the steaming wand where it joins the underside of the unit but that has not had any effect on the function of the machine.Still very happy.*****************UPDATE August 2014The leak in the steam wand worsened over time to the point that the unit had to be replaced but I give a HUGE thumbs up to Breville customer service here. They responded quickly to my initial support request and had arranged to replace the machine free of charge within 48 hours.Not only that but they offered to ship the new one to me in advance of the return of the faulty one (they placed a temporary charge on my credit card as insurance) enabling me to only ship the old one back after the new unit had arrived. Excellent service all the way around.I note that this machine prefers the beans to be ground slightly more finely than the previous one so another reason to invest in a grinder where you can customize the grind.
31 people found this helpful
analoguebubblebath –
Amazing home espresso machine, once you get the hang of it
First and foremost, this is an absolutely fantastic home espresso machine for the price. It definitely takes some practice to learn how to get the most out of and find the sweet spot (which i’ve learned always differs depending on the type of beans & grinder you are using). But now after 3 months and a LOT of researching/learning/practice/more practice, I am now consistently making absolutely fantastic espresso drinks. If you are new to the world of espresso, or have some knowledge, I wanted to write about my experience buying this machine 3 months ago knowing little to nothing about espresso, to now consistently pulling absolutely delicious espresso drinks on a daily basis with this machine. Here we go:I waited 3 months after purchasing this unit to write a proper review, and I wanted to give a lot of information I have learned and discovered to help others looking into buying a home espresso setup. I honestly knew little to nothing about espresso before purchasing this machine, and have done A LOT of research, reading, testing, and barista questioning in order to learn how the art of making quality espresso is done. I now make 2-3 espresso drinks a day with the Infuser and am EXTREMELY satisfied with its performance. It’s not easy to make a high quality espresso by any means, but once you figure out how to manage all the important espresso variables (type of beans, grind coarseness, dose, tamp pressure), this machine produces truly remarkable results that any professional barista will be highly impressed with (yes I did receive this feedback).The most important aspects of making this machine work well (and any espresso machine for that matter) are having a quality grinder and fresh, quality beans.When I first got this machine, I was under the impression you wanted to grind as fine as possible for making espresso. I set my Infinity Burr Grinder to its finest setting, using some peet’s espresso beans, and immediately the machine clogged up, not producing any espresso. I tried again, dialing the grind a little coarser, and again the machine clogged up. Same thing with the third time, although this time I was able to produce a few drops of espresso. After about 5 tries I was able to pull an actual shot of espresso which tasted incredibly strong to me but good (at this point in time I didnt really know what to look for in a quality shot of espresso).Long story short I realized the beans I was using were INCREDIBLY oily and played a huge factor in easily clogging up my machine. Next I purchased some Blue Bottle espresso beans, which got along with my machine MUCH better. Now I was making some great progress, tasting more like espresso, but still not close to what the baristas at Blue Bottle were serving.I went through a lot of beans & brands playing with the grind coarseness, and soon became familiar of the “sweet spot” settings on my grinder where the espresso came out tasting best. I was now becoming more familiar with what a good shot of espresso was supposed to taste like after spending a bunch of time at Four Barrel & Blue Bottle cafes in San Francisco. I also learned to start timing my shot times and that also helped me immensely improve the quality of my espresso (typically between 24-30 seconds depending on the type of beans you are using).So now I soon learned my Capressa Infinity burr grinder did not have nearly the adjustability I would need to lock in the perfect grind setting for espresso, so I decided to upgrade to the Breville Smart Grinder. The Smart grinder ended up being a much better grinder, but again long story short, it also seemed to lack the real “fine tuning” ability that I was learning is truly needed with espresso. After using the Smart Grinder for 3 weeks, I decided to pull the trigger on a much higher quality grinder, the very highly recommended Baratza Vario. After getting familiar with the Vario by some trial & error, I must say this was the ultimate step (and proved to be most important) towards producing amazing quality espresso. I’ve also ground for drip coffee with it a few times and the taste was truly amazing compared to both of the other grinders I had tried.So, back to the Infuser. After much more research into the art of espresso, I purchased a gram scale in order to weigh my doses of coffee & amount of liquid being extracted from my shots, which also have helped a LOT in improving the quality of my shots.Now after a couple solid months with all of the above in my home espresso setup, I believe I have dialed in this machine to its maximum potential, and it is really producing fantastic results which I get excited about drinking every morning as soon as I wake up.Some notes I would like to share which I have discovered that may or may not relate directly to this machine, or to every espresso machine:-The type of beans used almost always require a different coarseness setting in order to pull the perfect shot. For example, beans like Four Barrel & Blue Bottle always require much more fine grind settings, where beans like Stumptown & Barefoot require much coarser grinds. This seems to be hard to get used to, but now that I have tried many different quality espresso roasts and have narrowed down my favorites (Sightglass is #1, Stumptown #2, Barefoot #3) I know what setting to use ahead of time and I can almost always nail a perfect shot on command.-The milk steamer does a great job, but now after trying so many quality cappuccinos & lattes through the area, I feel like this steamer does the milk more on the creamy side. I believe I understand the technique for creating quality microfoam to use for cappuccinos & latte’s, and im using the same Clover Organic whole milk that almost all cafe’s use, and mine always seems to turn out a bit sweeter & creamier. It seems hard to get the microfoam as velvety thin as Sightglass/Four Barrel/Blue Bottle does, and because of this, my cappuccinos dont have quite the “intense coffee bite” but its getting pretty close. I believe this is as good as I can ask for again using a $500 home espresso machine.-The hot water dispenser is great. One trick I figured out a while back was when I pulled OK shots and didnt want to waste them, I would just instantly make them into Americano’s, since its a bit harder to taste a bad shot in an Americano than it is in a Cappuccino or Latte.And thus has been my experience with the Breville Infuser since purchasing about 3 months ago. I’m sure I will be updating this review further as time goes on, but so far it has been an incredibly positive experience and I would HIGHLY recommend this machine to anyone looking for a semi-automatic machine in this price range. Hopefully this was helpful and not just me rambling.
484 people found this helpful
Dave –
Excellent machine when you are ready to move up to using an non-pressurized filter
If you just want to make espresso drinks at home and want something quick and easy, there machines a lot less than half the price to use with pressurized filters and that have an easy to use steam wands. But if you are ready, or plan to soon, move up to professional style non-pressurized filters, then this is a great machine for the beginner up through intermediate user at a very good price.One thing I want to say upfront, ALWAYS run an empty shot before making your espresso. The first shot runs about 20 degrees below the optimal 200 degrees and will result in an under-extracted espresso. It is also good to heat up your grouphead, portafilter and cup. It makes a very very good espresso that probably can only be beat by a $2.000+ machine. I used a non-pressurized filter on my previous machine, but noticed that the shots with the infuser brought some of the subtle tasted characteristics from my coffee beans. It is important to use a good quality conical burr grinder in order to grinds that are fine enough to use with a non-pressurized filter. I use the Breville smart grinder pro. I think this is a better way to go rather then getting the Breville Barista Express with the built-in grinder, for numerous reasons. One is that it is more flexible than the built-in one, which only has 30 settings. The smart pro has 60 settings so you can use it to get coarse grinds for a French press and other coffee makers. It is also much easier to clean and allows you to upgrade to a more advance espresso machine without having to buy a new grinder.The steaming wand works very well after a small bit of practice. There are some videos on youtube that are helpful. After some research it seemed the best milk to use is grassfed whole milk. So I bought organic grassfeed whole milk, and wow it is the way to go. It tastes great and easy to get an excellent microfoam. I highly recommend that you give it a try.The pressure gauge looks cool, but is totally unnecessary. I wish the tamper were a heavier all metal construction, though this lighter one is needed to use the magnetic holder, which is convenient. The tamper words oaky, so I will just have to get used to it. Overall this is a great machine at this price.update: 13December:thought I would address of common complaints I’ve noticed in some reviews. One being that it uses too much water and that the drip trays fills up to fast. Both are due to the fact that the steam wand purges (through the back of the tray) hot water after use, which is good so that if you pull another shot the water won’t be too hot. To me, it’s not a big deal to refill it. As far as the tray filling up, just do what I do … empty the tray each time you use it. It is very simple and only takes a few seconds. A plus is that the tray design is very easy to remove and install .. it is really no big deal at all.
125 people found this helpful
Wael –
High quality product
I had a provell with a grinder that I decided to replace with a Babynio Plus provel. When it arrived, I found it to be very light. I returned it and bought this profile. It worked for me for eight years straight. Heavy duty construction, strong pressure. A very impressive and durable product. It almost rivals expensive commercial espresso machines. I recommend this model and version of the Provel, whether you want a machine built with a grinder or like this one without a grinder. This version is of excellent quality. Although I bought it from Amazon, it was good used, but it was still amazing.
SJSJ –
2500 cups later: Definitely the machine for counter space and/or don’t want to plunk down big bucks.
Some disclaimers 1. I am not a professional Barista. However I did watch a ton of videos to learn how to get the espresso quality that a professional does (I mean a real Barista, not the push button coffee shop folks). And I do know what a good shot is and how to savor a fine espresso. I love cappuccinos and lattes too. So I was looking for a near-pro machine and definitely 9 bars of pressure plus simplicity of use.2. I am a hands on person and clean up and maintain things, so I didn’t want a dumb press and play machine (every bean is different, every roast is different, so if you don’t extract at the right pressure or have the right grind, it is a challenge to get crema). I grind my beans every time and make the espresso right there and keep the beans in an airtight container. 3. This machine shows you where you need to be pressure wise on the dial. Really simple. The challenge for me was getting the grind size and tamping right. So in my quest for reproducible success 100% of the time, I bought a few tools (I have reviewed them) that were recommended by professional baristas with millions of followers. Most aren’t needed, believe it or not. So save your money. And I make 6-12 shots of espressos a day for myself and my family and friends. This was a really busy summer and I have now made 2500+ shots and 95% were lattes (my original review was after 1000+ espresso shots) Baristas may disagree with my review but this machine is ABSOLUTELY the next best thing, just a tiny level below the $4,000+ machines. Choosing this particular model that has a single steam tank (instead of separate tanks – for water and milk) helped me save 3.5k in upfront cost on the machine. The pro-machines are not 54mm, this one is. I feel a large portafilter is a disadvantage in extraction as you spread the grind of a single espresso shot in a larger portafilter. If you are making cappuccinos or lattes, plewse do steam your milk first so that as soon as you extract the espresso you can use it right away in your latte or cappuccino.5. The 9 bars pressure is key to great espresso extraction. Even with this machine I couldn’t initially resolve the challenge of getting the pointer in the middle of the range on the display dial). Tamping and WDT tools didn’t work. Save your money on those tools. What did the trick for me was the 54mm neck collar and especially the mesh. How good? 100% of the time. Zero failures. My ~$50 WDT tool is sitting here, useless and un-needed. I first put the magnetic neck collar on (so no spills of coffee grounds) and it fits like a glove on the portafilter. Then I pour the coffee grinds. Another thing that helps is I take the tamping tool and knock all around the sides of the portafilter like you ring a bell. The vibration settles the grind. Then I press and tamp over the grinds. Then I place the thick metal mesh over it. And load the portafilter into its place. Turn it, and it locks. Then I press the button. And M A G I C. Every single time, the extraction happens between those two dots on the dial. More than half the volume is the crema!!! I found fresh Amazon beans and Starbucks espresso mix to be the best (you need medium to dark roast for coffee flavor to come through the milk in a latte). After about the first 40 cups of failures, I’ve had 2500/2500 cups of success. super well made). The tamping tool and the portafilter have no dents from my gentle knocking. Well made stuff. Every homeowner can now enjoy and save $7.50 for a horrible crass latte made by push button trained employees (fake baristas) at major coffee chains. All their original machines have been replaced by push button machines. My niece worked and trained at Starbucks and I am sharing allour learnings/experiences. Next time just watch your barista and see how they tamp, how they choose settings and you will know the quality before you’re even served the espresso. Your street corner barista will be a genius compared to these National coffee chains. They really understand the science behind espresso making. Also, for regular black coffee, I still use my Steel French Press (have had it for a few years). This Breville machine I use only for espresso, cappuccino and lattes. Every piece of equipment I mentioned here is reviewed separately.6. Value for money? Calculate $6-13 for a large latte with three shots (I have paid those in places like Panama City, Hawaii and NY and European countries from Vienna to Budapest etc). This machine paid for itself already within 6-7 weeks! I did not add the cost of coffee beans (I use top quality, single source organic beans and have now tried many coffee beans from all over the world) – even when I add that in, this machine paid for itself in 3 months.7. The back small tray behind the main tray, at the bottom of the machine fills up with a little water a few times. It’s about positioning, I found. Just empty it weekly.8. Water filling is a breeze. I use filtered water. I keep three inches space behind the machine. So I never have to move the machine. When I forgot to fill (4-5 times), the machine made a grunting noise and the shot paused. Easy. Fill up the filtered water. The machine started right away once I put the water in. I have done the rinse and clean cycle after watching the video – it is an easy process. The light however still comes on (even though I use filtered water). I just ignore it. I do wash the filter in the water tank periodically and that is a breeze as well.9. If you make steam and froth the milk, you will go through quite some water (cooling off and condensate). I recycle the water in the tray once it cools down by pouring it in my indoor plants. I use the coffee grounds as compost in the plant pots, too. And my plants have never been greener and healthier!!.10. I bought a knock box form Breville which I have no idea why they don’t sell with this machine (really shortsighted). This is my opinion. Plan on a bigger knockbox than the one I got. Also get a steel jug with markings on the inside as that helps with the right volume to make lattes.11. It is an Australian company not a U.S. one; so I was skeptical and saved my packaging and box for a month (returns are only 30 days). Pretty lousy way to develop trust, is my opinion. It’s not a small box (about 2.5 feet square) so good luck storing it and seeing it and wondering if you’ll be needing to send the product back…bad karma for the company!! I have of course dumped that box long ago.12. The hot water for tea and coffee is ready literally within a minute if that’s what you need from the spout.13. I am yet to try and adjust programming but it allows for more volume extraction as well if you like.14. The trimming tool they give is awesome and I used it to shave down my tamped down coffee puck initially. Now I hardly ever use it as I got the level and amounts all wired in my brain. It is a super useful thing they included with the machine.15. They have a plastic grab tool to open and clean the top of the wand – I used that and it was super easy. Now why would you make that out of plastic? Give the customer a metal one (shortsightedness again). This opinion, too; is mine. DO NOT throw that little tool away.16. It didn’t come with a properly sized coffee beans scoop. What a branding opportunity lost!! Every time a customer uses a scoop (I thank Oxo and think of Oxo, instead of Breville), they would remember your name, right? A plastic scoop must only cost cents!! The one they sent is a tiny one so you can never get your measure for beans using their scoop. Shows that it is a young company chasing the wrong things, and lacks depth of understanding for coffee making (and they’re in the coffee business). Still, a great barista-entry product, here; no doubt. So congratulations to the Breville team for giving me access to amazing espresso shots, lattes and cappuccinos without needing a 4.5k to 15k machine.17. I use a Fellow cup (thin lip of a doubled wall insulated cup) for the coffee. This company doesn’t even send you an espresso cup or anything!! All the gear is yours. (If Costco does things, they make sure the manufacturer provides all these little things so their member doesn’t have to run around for small stuff). Another brand opportunity lost.18. I use a conical grinder and I use airtight containers from Fellow, for those wondering what else would you need on this “make and have great espresso every time” journey. Factor those costs in. I didn’t, so I exploded my budget (a lot was wasted on tools recommended by Baristas that honestly NO ONE NEEDS if you grind beans by batches/every day). All you need is 1) larger knock box, 2) proper scoop for beans 3) neck collar and 4) a mesh which is A MUST in my opinion 5) Air right storage for beans. And you’re set. Have great cappuccino’s and latte’s EVERY time. Extracted at 9 bars to perfection, every single time!! Do not buy their press-on-the -screen-menu-machine model. Someone I know has it. Not the same foam quality at all. Foaming the milk has to be done manually – watch the videos. If you stick the wand and expect it to be a great latte or cappuccino- the faint is yours not the machine’s.19. I forgot to mention, the steam takes a minute longer and getting the milk foam right is a tough skill (I finally nailed it, and am working on latte art next for fun). For a homeowner you don’t need massive steam capacity and separate tank (3.5k more) and pressure adjustments (9 bars of pressure is ideal) on a machine (any more pressure is just narcissism as it doesn’t extract better espresso). Even the big chains can’t train and have their people follow the directions so all the coffee you get there is far far inferior and dumbed down by poor tamp and poor press. Their coffee will taste horrid once you start making your own espressos, cappuccinos and lattes with this machine.20. Lastly, I am me and you are you. If you’re not someone who will wipe down the steam tip (forgot they don’t supply you with that little piece of cloth either; (but the neck collar company sent me one, luckily!!), or empty the tray or fill water (I put filtered water to begin with to avoid the scaling issue), and aren’t interested in the mid level complexity or responsibility, than this isn’t for you. Just find a local barista and pay-up as you go.21. I did buy a latte art tool (This company doesn’t send you any). Breville fails to inspire homeowners into baristas who would have upgraded to their product again and again. (When I upgrade, it won’t be to another Breville machine, for sure, as much as I like this machine for what it does and the price I paid for it. They still cannot have me enrolled as their lifelong fan). Other companies that make end to end metal parts have 4K-15k costs of buying (even refurbished ones) and that I feel is prohibitive and ridiculous, This one has one tank and plastic parts wherever needed and that’s fine budget-conscious that I was; in my opinion. It is a super efficient machine. Space wise the machine really goes under the cabinet on a standard countertop in the US. No water lines needed. Standard power outlet, too. The top gets warm and fuzzy so you can keep your cup on it (just like French press or any coffee making temperature is important) so this helps. It heats up right away in less than a minute and a half. No issues at all. Great innovation in so many areas.22. If there are negative reviews, it is perhaps from people who don’t like doing annual stuff or don’t follow instructions or aren’t as particular with the process and application of a new knowledge or skill. As a homeowner, if you want to be making barista style espresso shots, this will do it – and that is a huge upgrade – buy you still need to read, be willing to learn feom your own failures and not blame the machine. Don’t expect a massive steam generation (not needed for one cup, of latte a time) or separate large storage tank (one for milk pressure and one for hot water pressure) when it really ain’t needed. This makes one cup at a time so my family learns to be patient with me too!!Lastly, do upgrade your coffee drinking. It isn’t like wine. I found a really huge difference when you have the right bean, freshly ground and espresso yielded by this machine. And I sat on this purchase for 6 months before I actually bought it. Wish I could have saved all that money at the coffee places I went in my search for a great cup of coffee every single time. This machine (my model is the one with the pressure -don’t make the mistake of buying the lower model number), this model BES840XL does that at a price that is just unbeatable. And don’t buy the ones with the screen and grinder built in. The grinder is likely to wear down and have issues working as it is used the most.I wish all of you awesome cups of espresso, capppuchino and lattes!! Everyone I know loves my coffee, my espresso extraction and lattes more than theirs at home from the $180-400 models and makes. This model is clearly a winner at the price and what it provides (9 bars of pressure, and success each time that you can see on the dial). The only thing you need to do is watch videos on foaming the milk. And you’re all set.
89 people found this helpful
Sneaky PotatoSneaky Potato –
Don’t Waste Your Time With Cheaper Machines
Going into this, I had zero idea how to make espresso. I’ve been using a french press for years, and decided that I wanted to step up my coffee game a bit. This review is for those people that are considering this machine and have no idea what they’re doing. Keep in mind that I paired this machine with the Breville Smart Grinder Pro, which is important in this review. I highly recommend the grinder as a companion to this espresso machine.**Why You Should Buy This Machine Over Cheaper Ones**Simply put, this machine offers professional-quality features packed into an entry-level machine, and will produce a far better quality espresso than cheaper machines like the Mr Coffee. If you are considering getting into espresso, don’t waste your time with cheaper stuff or else you will likely be disappointed with the results or just find yourself upgrading everything in a couple of months. A POOR ESPRESSO DUE TO “CHEAP” EQUIPMENT IS WORSE THAN A CHEAP CUP OF COFFEE. Understand that “cheap” is relative here. This is an expensive drink to make, but it’s worth the money to be able to make a great drink.1. My perfect pulls taste EXACTLY like coffee-shop quality (at least to me). I can make a Caramel Macciato and it tastes and looks better than Starbucks. ISN’T THAT WHY YOU’RE WANTING AN ESPRESSO MACHINE? Let’s face it, most of you are wanting lattes and cappuccinos that taste good so you don’t need to spend five bucks a day at the coffee shop. You aren’t just slugging back straight shots of black espresso and writing down the subtle flavor notes to share with your friends. YOU WILL NOT GET THIS KIND OF QUALITY WITH CHEAP MACHINES. It will taste watery, sometimes a bit bitter, and just not really worth the money. You’ll spend a couple hundred bucks and be totally disappointed. This machine is expensive, but at least I feel like I’m actually getting good espresso out of it. and I have zero desire to return to another coffee shop when I can make it just as good at home.2. This is the only unit for under $500 that will let you make decent latte art with the milk steaming wand. Other cheaper units simply do not have enough power to make your milk the right consistency. Again, it goes back to the quality of the drink. Do you want to pay $300 for a really mediocre espresso every day, or pay a little more money and have a really good espresso every day? You can get better units for milk steaming, but if you’re looking for a standalone unit that also does great milk, this is it. If you aren’t drinking lattes, then it won’t matter much to you. But trust me when I say that well-steamed milk makes or breaks your latte/cappuccino. Perfectly steamed milk is sweet, frothy, and creamy. Poorly steamed milk tastes like it was microwaved, or just plain warm milk. Yuck.3. The pressure gauge and pre-infusion (pushing a little water into the espresso before the real pull starts happening) make this a great tool to learn how to make proper espresso. The gauge is immensely helpful and helps you understand what you are doing wrong, and when you’re doing things really right. Few things are as satisfying as making a perfect espresso and seeing the gauge sit in the perfect spot.4. Built-in temperature control, which means more consistent espresso results. Cheaper units that don’t have one are not really worth the money in my opinion. A poorly-made espresso is terrible, and you can honestly make a better drink with a $10 french press and a $50 grinder.Finally, you need to understand that espresso is actually kind of difficult to make if you’ve never done it before. This isn’t a Keurig, this isn’t the same machine that Starbucks uses (theirs cost almost as much as your house does). You aren’t going to make a perfect pull of espresso your first time. It took me TEN shots before I made anything even remotely drinkable, and then I went through half a pound of coffee beans before I pulled my first GOOD shot. This machine makes it easier to make really good espresso, but it requires a good amount of work and calibration from you in order to do it correctly. However, once you figure it out, it’s really easy to do it right every time.In my opinion, this is the “sweet spot” of espresso making. You can make a really great cup of espresso with this machine at an affordable cost. Any more money and you are paying MUCH more to slightly increase the quality of the drink, but it’s not the night and day comparison between this machine and a $200 Costco or Mr Coffee espresso maker. Highly recommend!**If you’re an owner of this machine, the following might be helpful**The biggest difficulties that I ran into while trying to figure out how to make espresso were:1. Grinding the coffee to the perfect size2. Realizing that the Single Shot cups are terrible, save yourself heartache and use the Double Shot (not double walled)3. Getting my shot to pull for the correct time (25-30 seconds)**Grind Size**This was the most confusing part to me, because I had it in my head that I SHOULD be able to grind all of my beans on the absolute finest setting on the Smart Grinder Pro, which was why I spent all the money on the nice grinder, right? I had seen a couple of videos where people were using my same setup and grinding down to a 1 or 2 setting on the grinder and pulling perfect shots in the Infuser.THIS IS WRONG.Clear your mind completely about grind, and realize that it has more to do with the perfect grind for your particular coffee rather than the grind number itself. Using Lavazza Super Crema, I could not go finer than a 17 on the grinder or else the machine would max out the pressure and I would get just a few drips of disgusting sour water. Using fresh coffee beans from a local roaster, I was able to go much finer on the grind, and actually a 17 was too coarse for that coffee and ended up ruining the shots. It’s okay if you have to use a 17 or 18 with some coffees. You’re buying a nice grinder because those 17 and 18 grinds are perfectly consistent, which means the pressurized hot water will evenly distribute rather than find a weak spot to channel and ruin your shot of espresso.See what I’m talking about? This is not a Keurig. You will need to calibrate your grind for each new coffee you try, which can either be a huge pain or a lot of fun, depending on why you’re buying this machine. I found it fun, but I’m also glad that I took an entire day to play around with this machine. Once I figured it out, I was blown away with the quality of the espresso that came out.**Single Shot and Double Shot cups + Shot Pull Time**This is where I found success after a lot of failure. See, I don’t drink a ton of espresso in one sitting. I’m perfectly content with a small latte consisting of a single shot of espresso. I actually put the double shot cups in a drawer, because I didn’t think I would be using them. I was pulling drinkable espresso after a few hours of trial, but my shots were coming out way too fast (15-20 seconds), when I knew perfect shots should be around 30 seconds from the time you push the button. A helpful user online told me to ditch the single shot cups and switch to double shot, because of how finicky the former cups seemed to be. So I switched over to the single-walled double shot cup, and my first pull was ABSOLUTELY PERFECT. It poured like golden honey, ran a perfect 30 seconds, and had amazing crema. It was beautiful and I wanted to cry.Apparently, shots pull more consistently in double shot cups than they do in single shot cups. Note that I’m talking about the size of the cup (single vs double shot) and not the double-WALLED cups, which are garbage and meant to be used with pre-ground espresso.Anyway, do yourself a favor and just use the double shot, single-walled cup. If you only want a single shot of espresso, move the cup over so you only catch liquid from one of the cups. You will waste coffee, but it will be so much, much more consistent and better-tasting than if you use the single-shot cup. I now pull nearly-perfect shots every time, where before I was doing 2/5 if I was lucky. Best piece of advice anybody gave me.
284 people found this helpful
Lincoln Davis –
Review After Two+ Years of Daily Use: Durable, Excellent Machine
Despite being really happy with this espresso machine, I have held off on writing a review for it too early because my main concern when parting with the money for such an expensive item was its durability. Having owned it for a little over 2 years now (purchased May 16 2009), I think that I can now feel comfortable sharing my opinion.I worked at a coffee bar 20 years ago, and, since that time, I’ve have always wanted an espresso machine for my home. The problem always was that they are very expensive. When I was 19, I was too broke to afford one. Now, at 39, I’m just cheap, and I was held back by the nagging idea that, no matter how good the coffee that comes out of it is, it’d be really financially unwise to spend a lot of money on an espresso machine unless it would last many years.My wife and I first met at that coffee bar where I worked in the early 2000’s, and we bought this machine on our 10th wedding anniversary. I did as much research as I could beforehand, and I don’t regret the decision.It makes espresso and foams milk every bit as good as the professional machine that I used 20 years ago. The portafilter is no different from a professional machine. The steam has slightly lower pressure, so it takes somewhat longer to steam milk, but it is able to make foamed milk with the exact same quality as a professional machine, too. No complaints there. I can make espressos, americanos, cappuccinos, lattes, etc that are better than the local coffee shop’s. I use a manual burr grinder to grind my coffee (a Lido 2) and use freshly roasted coffee. The espresso is amazing, and my mom and sister come to my house just to get me to make them some.I’ve had zero problems with durability. I use the machine almost every day, and it just works with no problems. The company includes instructions for maintenance that makes me think they are paranoid that people are going to be trying to make espresso using pond water and then lodge complaints when they end up with problems. I followed those instructions for the first month or two and then stopped worrying about it. I haven’t ever changed the water filter in the tank, and I haven’t run a cleaning cycle on it in over 2 years. I do use reverse osmosis filtered water which won’t gunk up the machine with mineral deposits. It makes the coffee taste better, anyway. Why would you spend so much money for something that makes amazing coffee and then use sink water?I don’t necessarily recommend you not follow the company’s instructions, but I feel confident at this point that the machine is well-made and doesn’t need to be meticulously maintained to avoid problems. I would use filtered water, though. You also really will need a burr grinder (and they’re not that cheap… i think my manual grinder was $180) and somewhat fresh coffee. I have tried making a shot using cheap coffee that’s probably been sitting on the grocery store shelf for months. It will make a shot, but it’s hard to get the water pressure right, and it is noticeably less tasty.So that’s my review. Overall, the cost of these machines is intimidating, but this one is capable of making 100% professional quality espresso and steamed milk. You just have to use fresh coffee and a burr grinder for even particle size. The machine is well-made. It isn’t going to break down on you after just a year or 2 of use even if you aren’t faithful with cleaning and maintenance. It seems like the cleaning/maintenance instructions are concerned a lot about hard water, so just use good water. I think it’s an excellent value–much, much cheaper than daily trips to Starbucks! I’m really glad I bought it and recommend it without hesitation.
70 people found this helpful
Perfectrancenow –
Pulls beautiful shots
Would I recommend buying this? Absolutely. But here are some things you should be aware of.If you follow the instructions on how to properly pull a shot, pre-warm your cup, and steam your milk, it uses about 1/4 of the tank. Sometimes even 1/3 of it. After you steam, hot water is released into the back compartment in order to get the temperature back down.If you buy this, please only use filtered water. Invest in replacement Breville filters for the tank, and cleaning tablets for the portafilter. Remember, these are sensitive mechanical parts. And if you follow the basic care instructions in the manual, your machine will take care of you if you take care of it.When using this machine for morning coffee, you need to turn it on and let it stay on for 20 minutes. It needs to have time to get hot. Make sure your tank is full, and empty out the drip tray – the drip tray gets almost full after each use.Right now, I want to steam my milk before pulling a shot. But that seems pretty difficult. I might be forced to pull the shot, and then do the milk.I’ll try to add more feedback later. You’ll also need to invest in a burr grinder. And I would recommend either an espresso dosing cup. Or a dosing rim to screw onto the top of the portafilter. Get a burr grinder that will accept a 54mm portafilter. Get a coffee scale (Hario coffee scale) and weigh out about 19g of fresh beans. Do yourself a favor and invest in a very heavy tamping device. And when you tamp using the dosing ring, don’t be shy about it and throw your body weight into that tamp. You’ll have a beautiful shot with the non-pressurized double shot basket.Your total investment in the machine, grinder and accessories will run you about $700. Go with the Breville as opposed to some Italian or other European crap which you can’t get parts for and work on it on your own. Buying European = sticker shock and many problems down the road. If you take my advice- use only filtered water, expect that you will waste a lot of water, buy lots of extra tank filters and backflush cleaning tablets, you should be good to go and go a long time before it needs to be de-scaled. If you take care of it (not a lot of time needed), the machine will basically pay for itself after about 100 double shots. And you can easily use this for 5 years. If you take care of it.Be patient when you start off. The instruction manual is very intuitive. Do a little at a time. Put your filter in the tank and follow the instructions. Just start out by pulling the shots. Even imperfect shots far out-preform keurigs. Be patient with the instruction manual. It is your friend and will protect your investment.Think about it — if you set this machine up for success, you will save SO MUCH money compared to the high end coffee shops. Plus you have more time to pull a beautiful shot, as opposed to the ones that the shops pulled that are definitely half-assed because they’re trying to move at the speed of lightning.Get your grinder, your Hario coffee scale, and dosing ring that clicks into the portafilter. Look in the manual and learn how to program how long you want the double shot to run water through the portafilter. If you read it, it’s actually quite easy.It doesn’t take much time, but once you get the hang of it, you will be shocked on how beautiful the shots are and the flavor complexities you’ll pick up using the non-pressurized double shot basket.I hope this helps! And again, stay away from anything from Italy. And anything where a portafilter isn’t being used (as opposed to a spout, bad shots, and hard to clean internals for 5x the price).If there’s anything else I can think of, I will add on. This investment will save you loads of money down the road. And you can take pride in doing better job at home.
43 people found this helpful
justme –
A Safe Bet for Your First Real Espresso Machine – But Be Patient with Yourself!
—UPDATES 5/25/15—1. Used this every day for over a year. Solid buy, would do it again. No breakages. I do follow the cleaning instructions religiously.2. I was wrong about the machine only delivering 1 or 2 ounce cups. This morning I finally read the instructions on how to “program” the machine and made myself a 4-ounce cup of strong coffee, similar to what you find in europe. Divine! I got everything ready as usual. Hit the program button. Hit the “one cup” button. Let it fill up about four ounces. Then hit the “one cup” button again. The “one-cup” is now programmed to deliver about 4-oz of coffee. Brilliant!—Original Review—I found it difficult to research espresso machines:- Price range is huge, from $50 to $5000.- Reviews come from a bewildering range of backgrounds: coffee-snobs & anti-snobs, professional baristas & novices.After reading reviews for a couple of days, I selected the Breville 840XL.I’ve had the machine one month.I am no barista, so this review is geared towards the novice explorer.General Observations:- The pressure of the water/steam is controlled by the machine. It is amazingly repeatable & scientifically-precise.–> i.e. the pressure gage on the machine responds to even tiny changes in grain size or tamp-pressure.- The temperature of the espresso is also very controlled, and it’s not as hot as your regular cup of Joe.- It’s taken me one month to find & consistently reproduce a cup that I enjoy. It was worth the wait.- My guests & visitors have all been amazed by the shots. They unanimously say they’re the best they’ve had.- This machine serves exactly one-ounce or two-ounce shots. It will not make a pressed cup of coffee like you get in Europe.- It’s strong. I mean really strong. Like I-feel-it-in-my-brain strong.–> i.e. after two older guests got hot flashes and a third got heart palpitations, I stocked up on decaf beans.Specific Tips:- Buy a burr grinder first, learn how to use it, clean it, etc. (I bought the Breville & am happy with it.)- Buy the Breville milk frother second, learn how to use it, clean it, etc.–> It’ll change your life.–> Way easier than wand-frothing: faster to make, easier to clean-up.–> The Breville milk frother makes Angelina’s-style hot chocolate easily, which makes it worth the 120-bucks right there.—-> Guys, if you don’t know what that is, then look it up & make it for your girl. & beware the consequences!—-> Only change from the instructions: don’t drop room-temp chocolate into the frother, nuke it first & use a spoon to drop it into the hot cream.—-> …but, I digress.Bean Selection–> Consensus from Amazon-reviewers is that Lavazza Super Crema whole bean is the ideal. My guests seem to like this bean the best.–> Personally, I prefer Starbucks Sumatra. These beans are very oily.–> NOTE: if you decide that the bean you like best is an oily bean, then you’ll need to clean the grinder weekly. Takes five minutes and gets less messy as you get the hang of it.Grinder- Follow the darned grinder instructions!–> Start at the coarse end of the espresso-spectrum, work your way towards fine.–> Only go as fine as you need to get the results you want. Middle worked best for me.Espresso Machine Pressure Gage- Watch the pressure gage carefully for every shot. But defer to your palate. The machine can’t tell you what tastes best.- I find that the best tasting shots come at lower pressures. I go with the lowest possible pressure that still produces a nice crema.Water Source:- I use a five-gallon water-dispenser to fill the espresso-machine’s tank. TDS reading is about 4, which is almost distilled.- Rationale: for five hundred bucks, I don’t want to fill it with rusty-calcium well water & then have to decalcify every month or have it break. You can get a TDS meter for about twenty bucks on Amazon. Buy one. Test your water. Only use water with a low TDS reading. Don’t assume bottled water has a low TDS. I’ve seen it as high as 200.My Patronizing Opinions:- Many people point out that this machine is Barista-Child’s-Play, since you control only four variables: bean, amount, fineness, and tamp-pressure. (Not temp or pull-pressure.)- I took a rigorous scientific approach and it still took one month to find the right combination.- Other reviewers bought this machine & made an espresso they liked on the first pull.- Pay attention to the process and you will begin teaching yourself how to be a barista.- Be willing to work with the four variables for several weeks to get it right.Transition from Coffee-Drinking to Espresso-Drinking:- Until now, I’ve made a brutally strong batch of French-pressed coffee each AM.- When I go to Starbucks, I get either a triple-tall Americano or a four-shot Grande Americano.–> Either way, each would last about 2-hours each AM.- This machine makes only one thing: a single-ounce or a two-ounce shot of espresso, like in Italy.- The Italians drink it straight, right there, standing up, within five minutes. I’m guessing that even an Italian would rate this espresso as authentic.- This machine forced me to depart from my old ways: It’s a smaller cup & I have to drink it within 15-minutes or so before the flavor goes sour.–> I’m aware that the ideal Americano has the hot water in the cup prior to the shot, to preserve the crema. Will do that eventually. Right now, I still taste each shot first.Conclusion:- This machine is a safe bet for your first real espresso machine.- Be willing to work at it- Be aware that drinking shots of espresso is a very different experience from regular coffee-drinking.- Cappuccinos or lattes are also a safe bet. But, they get cold quicker than those made at Starbucks. Maybe Starbucks makes shots at a higher temperature?Biggest surprise so far the joy it brings to guests. Let them watch you make one, then ask them to play the barista. They have so much fun! Go all the way & buy a burr-grinder, knock box, & tamping mat.There’s a documentary on Netflix on the history of the cappuccino called “Perfect Cappuccino.” Content aside, this 1.5-hr documentary will give you plenty of opportunity to see professional baristas making espressos & hear their theories on how to pull a good shot. Watch it after you buy it and you’ll really appreciate how much they put in, how they tamp it, and how it looks as it comes out. Personally, I enjoyed the documentary — I found the narrator’s views compassionate & well-balanced. Other reviewers found her anti-Starbucks.Lastly, if you buy all three pieces of equipment at once, then you’ll be on instructions-overload. I staggered the purchases by two weeks for each machine: Burr Grinder, then Milk Frother, then Espresso Maker. This may sound silly, but many of the reviewers say things like: “I Couldn’t get a pressure reading on the espresso machine, so I cranked up the grinder to super-fine and then grinder wouldn’t work.” All of that is covered in the grinder instructions. But if you get all three things at once, you’re going to try it blind (come on, admit it) and only go to the instructions for each machine as a last resort.It’s only been one month. Perhaps in another month, all of my advice will be different. I’m still on the left side of a steep learning curve.Good luck!
119 people found this helpful
EDGAR Robinson Avendaño –
Exceptional Espresso at Home – Perfect for Learners and Pros Alike
I’ve been using the Breville Infuser BES840XL for years and it’s been a game-changer. The build quality is superb, and it’s ideal for both beginners learning the art of espresso and experienced baristas looking for a solid machine at home.I also own the Bambino model for my workplace, and now I’m considering upgrading to one of the more advanced Breville machines — that’s how much I trust the brand. The Infuser is reliable, intuitive, and delivers rich, balanced espresso every time.With this machine in my kitchen, I feel like I have a professional café setup at home. Breville products elevate the space with their design and performance. If you’re serious about espresso and want a touch of gourmet sophistication in your own home, this is absolutely worth it.
4 people found this helpful