
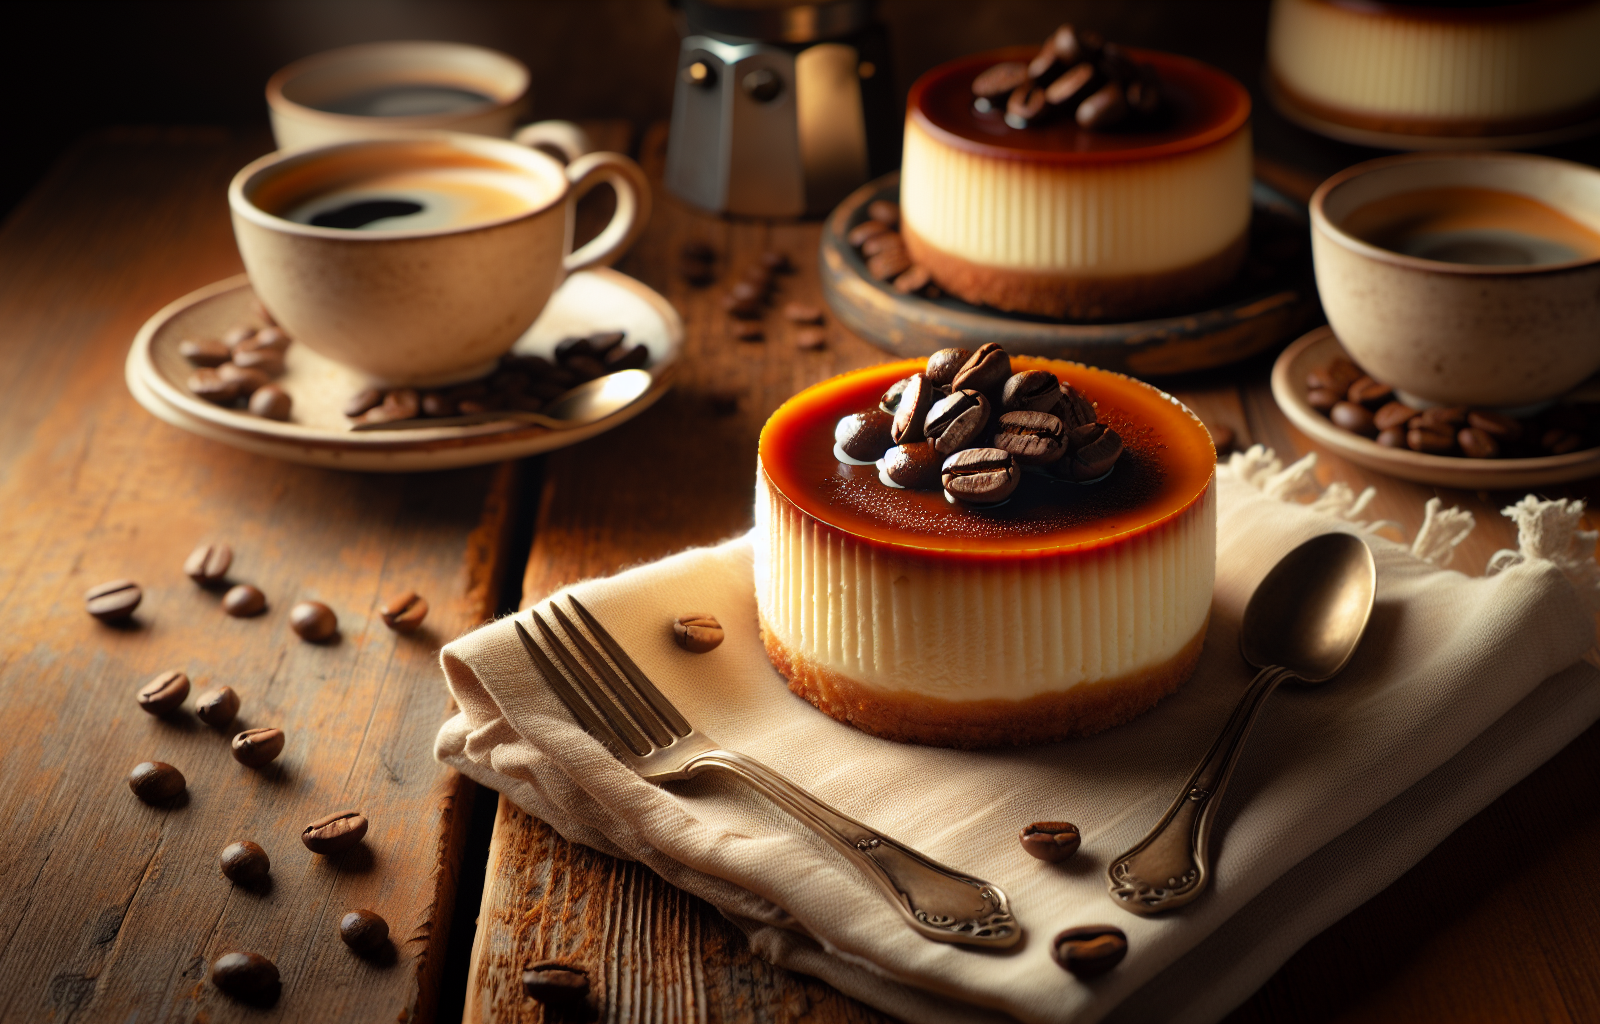
If you love coffee and creamy desserts, this mini coffee cheesecakes recipe is the perfect addition to your baking repertoire. With a velvety filling infused with coffee flavor and a choice of crumb crusts—Oreo or graham cracker—these bite-sized treats deliver a delightful java jolt in every forkful. You can whip up a batch in a regular muffin pan using accessible ingredients, making them ideal for parties, date nights, or whenever you crave a coffee-inspired dessert. These cheesecakes are both flavorful and fuss-free, so roll up your sleeves and get ready to bake.
Ingredients
- 16 ounces cream cheese, softened
- ½ cup granulated sugar (adjust to taste)
- 1 tablespoon espresso powder (or strong instant coffee)
- ¼ cup strong brewed espresso (optional if you want even deeper flavor)
- 2 large eggs
- 14–16 Oreo cookies or graham crackers, finely crushed
- 3 tablespoons melted butter
Optional toppings:
- Whipped cream or coffee-flavored whipped cream
- Chocolate-covered espresso beans
- Caramel drizzle or chocolate ganache
Directions
- Preheat and prepare.
Preheat your oven to 325°F. Line a 12-cup muffin pan with paper liners. Set aside. - Make the crust.
- Stir the crushed Oreos or graham crackers together with melted butter until it resembles wet sand.
- Scoop about one heaping tablespoon of the mixture into each liner.
- Press the crumbs down firmly to form a solid base.
- Mix the filling.
- In a large bowl, beat the softened cream cheese and sugar until smooth.
- Add espresso powder and, if you like a stronger taste, the brewed espresso.
- Crack each egg into a separate small dish, then add them one at a time. Beat each egg just until combined—avoid overmixing to prevent the cheesecakes from sinking.
- Fill and bake.
- Spoon the filling evenly over the crust in each liner.
- Bake for 15 to 18 minutes. The edges should look slightly puffed, and the center will jiggle gently when the pan is nudged.
- Turn off the oven and let your mini cheesecakes cool in the pan for a few minutes before removing them to a wire rack.
- Cool completely.
- Allow the cheesecakes to reach room temperature.
- Transfer them to the refrigerator for at least 2 hours (or overnight) so they can fully set.
Tips & Variations
- Check carefully. Use the “jiggle test” to ensure the center is set without overbaking.
- Switch up the flavor. Coffee syrup is another easy way to infuse coffee essence, especially if you can’t find espresso powder.
- Experiment with crusts. While Oreo crumbs add a rich chocolate twist, a graham cracker base creates a lighter flavor.
- Top it off. Dress them up with coffee whipped cream, chocolate ganache, or caramel drizzle—whichever best suits your sweet tooth.
Nutrition Facts
| Nutrient | Amount |
|---|---|
| Calories | ~285 kcal |
| Total Fat | ~20 g |
| Saturated Fat | ~11 g |
| Cholesterol | ~85 mg |
| Sodium | ~210 mg |
| Total Carbohydrates | ~22 g |
| Dietary Fiber | ~1 g |
| Total Sugars | ~15 g |
| Protein | ~5 g |
| Calcium | ~70 mg |
| Iron | ~1.5 mg |
| Caffeine | ~25–35 mg |
Final Thoughts
These mini coffee cheesecakes offer a satisfying way to enjoy both rich espresso flavor and velvety cheesecake. They’re delicious for birthday celebrations, cozy nights in, or just because you’re craving something sweet. The best part? They’re easy to customize, simple to store, and a breeze to share—or not. Once you try them, you’ll have a new go-to dessert in your recipe rotation.
Frequently Asked Questions (FAQs)
- How do I know when my mini cheesecakes are done?
You want the edges to look slightly puffed and the center to have a bit of a wobble when you nudge the pan. Overbaking will make them dry or crack on top. - Why did my mini cheesecakes sink in the middle?
Overbeating the eggs can cause them to puff too much and then collapse. Mix eggs in one at a time, just until combined. - Can I make these without espresso powder?
Absolutely. You can use strong brewed coffee or coffee syrup instead. If you’re not a fan of coffee flavor, you can even swap in caramel or chocolate syrups to experiment with different takes on the recipe. - How long do these cheesecakes keep?
Store them in the refrigerator in an airtight container for up to 2 days. For longer storage, keep them in the freezer for up to 1 month—just add whipped cream toppings before serving for best results. - Can I use a mini cheesecake pan instead of a muffin pan?
Yes. If you have a specialized mini cheesecake pan, feel free to use it. Follow the same baking time guidelines and keep an eye on doneness using the jiggle test.
Mini Coffee Cheesecakes Recipe
12
servings30
minutes18
minutes285
kcalIngredients
16 ounces cream cheese, softened
1/2 cup granulated sugar (adjust to taste)
1 tablespoon espresso powder (or strong instant coffee)
1/4 cup strong brewed espresso (optional if you want even deeper flavor)
2 large eggs
14 – 16 Oreo cookies or graham crackers, finely crushed
3 tablespoons melted butter
- Optional toppings:
Whipped cream or coffee-flavored whipped cream
Chocolate-covered espresso beans
Caramel drizzle or chocolate ganache
Directions
- Preheat and prepare.
- Preheat your oven to 325°F. Line a 12-cup muffin pan with paper liners. Set aside.
- Make the crust.
- Stir the crushed Oreos or graham crackers together with melted butter until it resembles wet sand.
- Scoop about one heaping tablespoon of the mixture into each liner.
- Press the crumbs down firmly to form a solid base.
- Mix the filling.
- In a large bowl, beat the softened cream cheese and sugar until smooth.
- Add espresso powder and, if you like a stronger taste, the brewed espresso.
- Crack each egg into a separate small dish, then add them one at a time. Beat each egg just until combined—avoid overmixing to prevent the cheesecakes from sinking.
- Fill and bake.
- Spoon the filling evenly over the crust in each liner.
- Bake for 15 to 18 minutes. The edges should look slightly puffed, and the center will jiggle gently when the pan is nudged.
- Turn off the oven and let your mini cheesecakes cool in the pan for a few minutes before removing them to a wire rack.
- Cool completely.
- Allow the cheesecakes to reach room temperature.
- Transfer them to the refrigerator for at least 2 hours (or overnight) so they can fully set.
Notes
- Check carefully. Use the “jiggle test” to ensure the center is set without overbaking.
Switch up the flavor. Coffee syrup is another easy way to infuse coffee essence, especially if you can’t find espresso powder.
Experiment with crusts. While Oreo crumbs add a rich chocolate twist, a graham cracker base creates a lighter flavor.
Top it off. Dress them up with coffee whipped cream, chocolate ganache, or caramel drizzle—whichever best suits your sweet tooth.


5 thoughts on “Mini Coffee Cheesecakes Recipe”
This is now my go-to dessert when I need something impressive but low-stress. The combination of espresso and creamy cheesecake is a match made in heaven. I added whipped cream and a chocolate-covered espresso bean to each one—they looked so cute and tasted amazing! Thank you for such a thoughtful and well-written recipe.
These mini coffee cheesecakes turned out absolutely divine! The texture was so creamy and smooth, and the espresso flavor gave just the right kick without being overpowering. I used Oreo crusts, and they added a wonderful richness. My family couldn’t believe they were homemade—they looked and tasted bakery-quality!
I’ve made a lot of cheesecakes over the years, but this recipe is hands down one of my favorites. It’s incredibly easy to follow, and the results are consistently delicious. The coffee flavor pairs perfectly with the creaminess of the filling. Highly recommend topping them with caramel drizzle—it takes them to the next level!
As a coffee lover, I was excited to try this—and it exceeded expectations! The espresso powder infused just the right amount of boldness, and I love that the recipe offered flexibility with crust options. I went with graham crackers for a lighter base, and they were delightful. Perfect for small gatherings or even gifting!
What a fantastic recipe! These mini cheesecakes were a hit at my holiday party. The directions were simple, and the tips helped me avoid overbaking, which I often struggle with. I appreciated the make-ahead option too—they stored beautifully in the fridge overnight.